Clinical diagnostic efforts in next-generation sequencing are commonly defined at a gene panel level. The validation process of adding new genes to any diagnostic panel is ongoing, but labs typically construct and validate their clinical workflows for the current status of verified genes. This is not limited to primary finding results but can also include any incidental findings among the list of ACMG recommended secondary findings genes. Managing these gene lists is a never-ending process, and luckily Golden Helix has sought to include features that make this process not only simple but consistent to maintain the integrity of your validated workflow. The purpose of this blog will be to expose our readers to various features in VarSeq that can be utilized in building your gene panel filter.
Figure 1 shows the stage of filtering where the gene panel has been added. This stage follows a few other steps of filtering before the panel component. This includes the intrinsic variant quality scores at the top to isolate true positive variants in the VCF, then steps to remove common variants based on population allele frequency, and keep variants that impact the gene either as missense, loss of function, or perhaps affect a known or novel splice site. The “panel search” container is then added to contain any number of preferred approaches to isolate variants in the targeted genes. One example is to utilize a bed file of known targeted regions for your panel, or perhaps a list of genes entered as a virtual gene list.

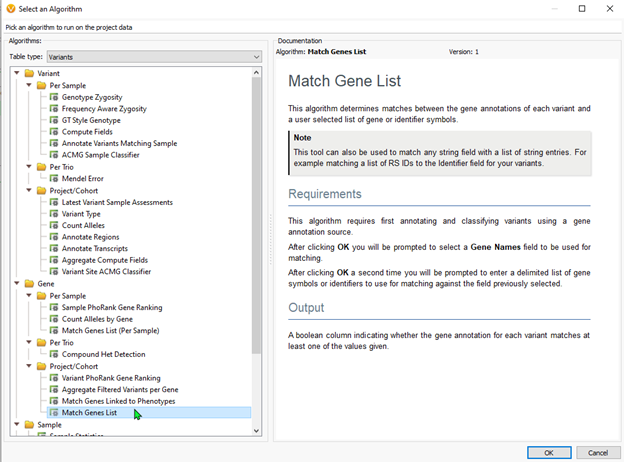
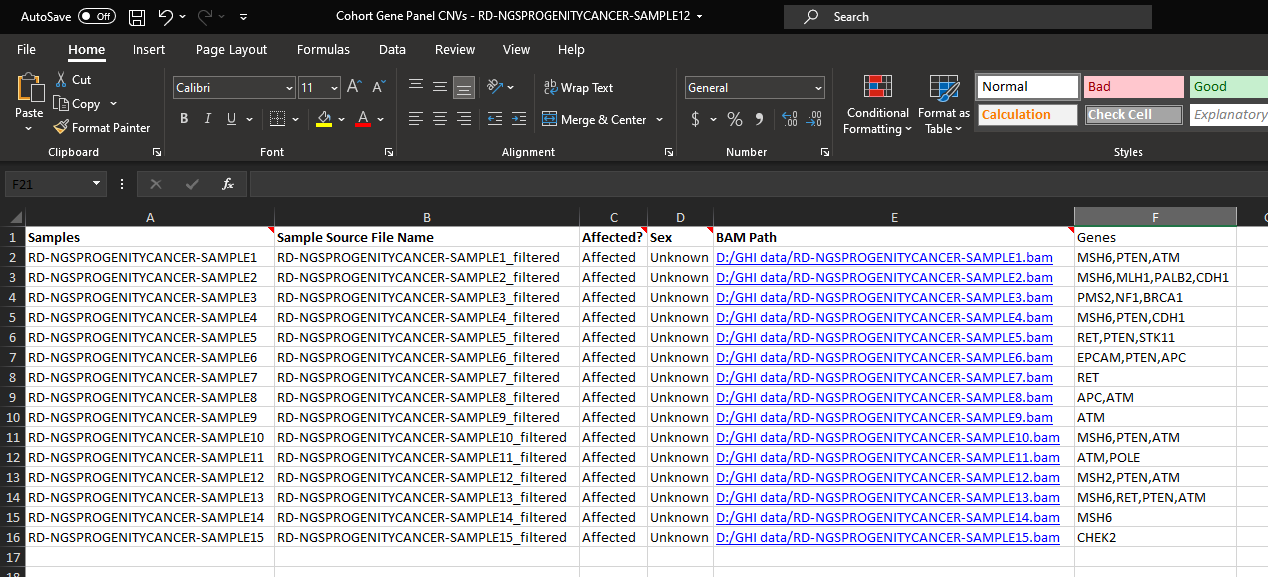
Users can utilize the Match Gene List algorithm (Figure 2), pasting in a list of genes to be used in the filter seen in Figure 1. Alternatively, users may desire to use the Match Gene List per Sample algorithm. This tool works exactly the same as the Match Gene List. Still, it adds a layer of specificity. If your project contains multiple samples, users can import a sample manifest that includes a field containing each sample’s selected genes for filtering. You can see an example of the sample manifest in Figures 3ab.

You may also notice another algorithm of potential interest may be PhoRank phenotypic search which creates a ranked value per variant (scale 0 – 100%) for the variant/gene association to the targeted phenotype. If the user is provided the phenotypic data for the patient, that term can be added to the filter and, in some cases, used in conjunction with the filtered set of targeted genes. In some situations, a defined panel of genes can become a bit narrow when filtering. The phenotypic component allows users to relax the filtering stringency and opens sensitivity to explore other potential genes that may correlate with the disorder.
The next release of VarSeq will include features that help facilitate the evolution of ongoing gene panel design. If you didn’t have the chance to watch our recent webcast on the subject, our Director of Research, Nathan Fortier Ph.D., breaks down the upcoming features and how they will be utilized in VarSeq. Here is a link to that recent webcast and blog. If you would like more format training on the subject of gene list filtering strategies, please reach out to schedule a call!