When using VarSeq; annotations, application settings, and assessment catalogs are all stored locally. Sometimes these resources can grow to large space grabbing directories, causing you to either purchase additional storage devices or getting rid of previously downloaded resources you might need down the road. But there’s hope! You can set where you want all of your data stored to be with just a few clicks, either as a network resource (ie. a NAS/file server) or an alternate hard drive.
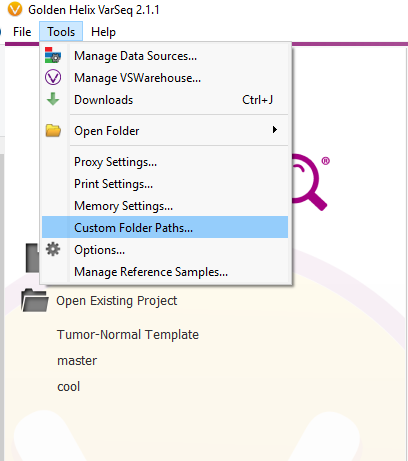
After launching VarSeq, in the top left corner of the dialog, you will select “Tools” and select “Custom Folder Paths”
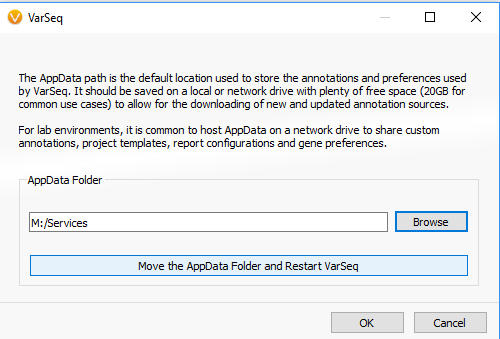
This will bring up the dialog shown below. Here you will select “Browse” and to select a new base directory for your VarSeq data. When you press the “Move the AppData Folder and Restart VarSeq” button, your existing data and preferences will be moved to this folder. Depending on how much data you have, this should only take a couple minutes.
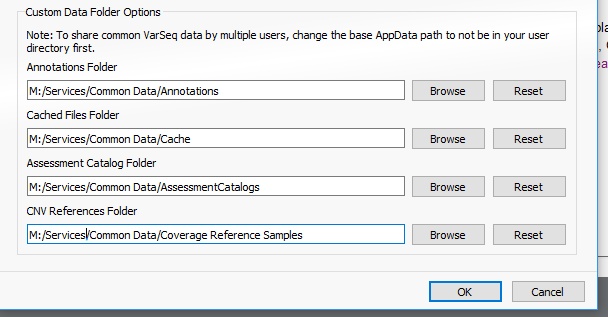
To verify the changes have happened, select the “Tools” menu item then click on the “Options Item” and you will see the file paths have changed.
I’ve chosen a network share so that my colleagues and I can share and collaborate with our projects. And now that this share is set up in a multi-user lab, we would follow these instructions to make sure all users are connecting to the same data and ensuring the best results and reporting.
Note that if you have just installed VarSeq and open it the first time, there will be a prompt o optionally select a AppData folder different than the per-user default. This makes it easy for new users to simply join the existing shared data folder you established.
If you have any questions or would like help with this process, please reach out to our support team at support@goldenhelix.com!