Let’s say you are the director of a large lab, which is running tens or hundreds of standard NGS sample analyses per week. You have a number of employees with varying levels of analysis background, and you want to be sure everyone is running the analysis the same way. You are also concerned about updating catalogs that could create differences from your validated workflow. The most direct way to solve this problem would be to create a number of standard analysis templates and lock them down to protect against accidental analysis changes. Making these ‘locks’ in VarSeq is a straightforward process that prevents changes to your project and future projects if applied to a template.
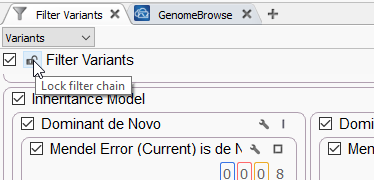
Take, for example, one of our Trio projects which has a rather complicated inheritance filter (Figure 1). After filling out my filter chain and including any gene panels, phenotypic match algorithms, or other computed data, I may want to lock down the entire filter chain.
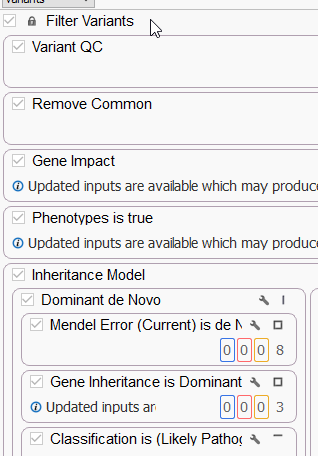
As seen in Figure 2, this removes the ability to make any changes to the designated filters while still allowing the user to view the contents of those filter containers.
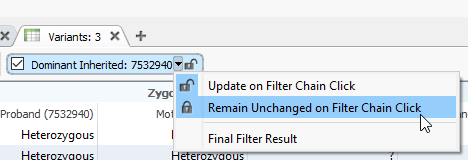
If you have different outputs in your filter chain with an OR logic, you may want to create variant tables to reflect those outputs. Here, I have selected the Dominant Inherited output for my filter chain, which the output is shown in the variant table (Figure 3). My next goal is to lock down this table so it will always only show the output of that filter. By clicking the drop-down option next to the name of the filter output, I can access the ‘Remain Unchanged on Filter Chain Click’ option.
Looking to ensure that there are no accidents in your analysis?
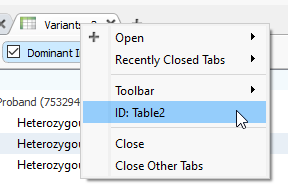
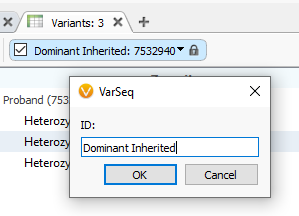
To rename my new locked table, I can right-click on the Variant Table header (Figure 4A), clicking on the ID term. Next, I can change the ID and hit OK (Figure 4B).
By setting up these sub-tables, I can easily assess the output of multiple filters generated in my filter chain by an OR logic (Figure 5).

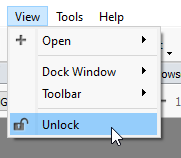
One shortcut in VarSeq is the ability to lock or unlock all of your tables with the master unlock button (Figure 6). This button can be found under the View menu on the upper top left side of your VarSeq window.
Some VarSeq users also prefer to lock down their annotation sources to those used in a clinically validated workflow. One way to prevent VSClinical from inquiring about using the latest sources is to lock down the annotations through the Annotations Versions and Download window (Figure 7).

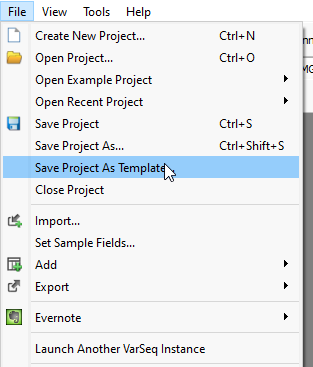
Once the user is happy with their final locked-down workflow, they may want to save the project state for use by themselves or other users down the line. This can be done by going to File > Save Project as Template (Figure 8).
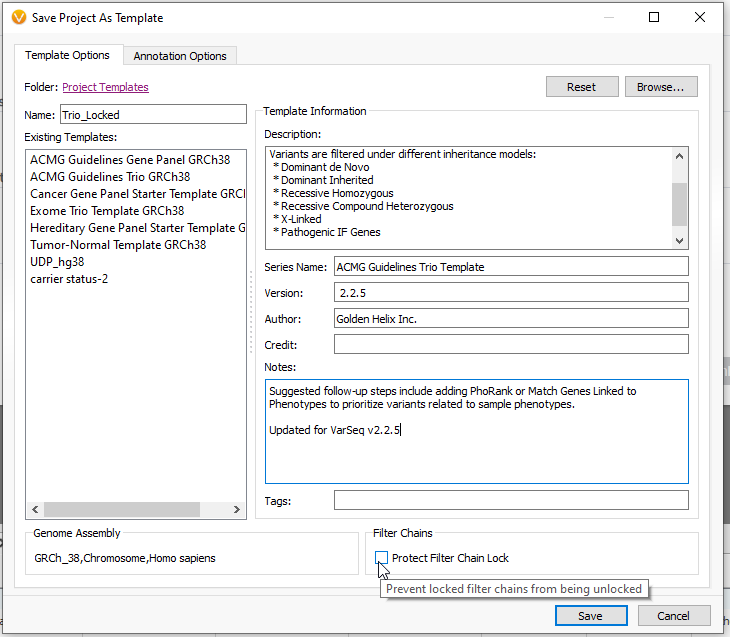
The Save Project as Template window gives many options for the save state of the template (Figure 9). For example, you can give the template a unique name, like Trio_Locked, to differentiate it from other templates. You can also include descriptions and notes for future users. One feature here to take note of is the Protect Filter Chain Lock, which will prevent the template from being unlocked while used.
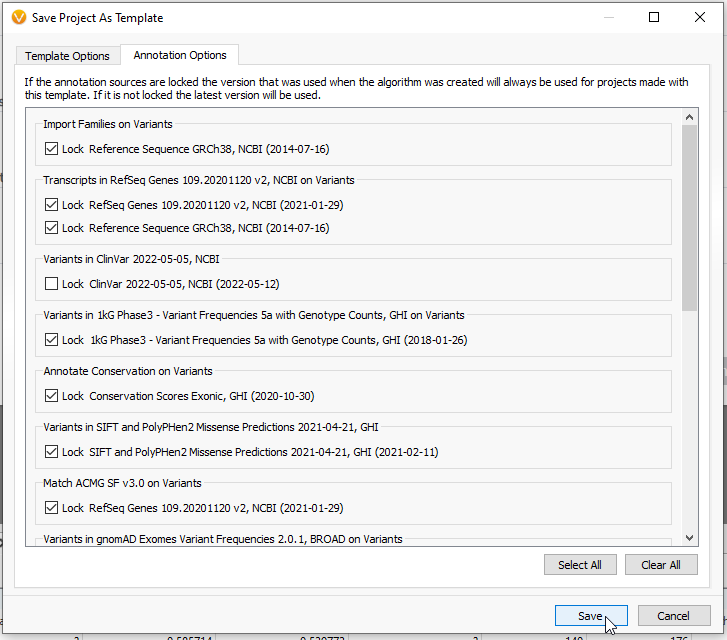
Going into the Annotation Options tab, there are also a number of sources you can manually lock down (Figure 10). These would include the specific versions of annotation sources and catalogs used in this project. Once the user is satisfied, they may Save that template and have it ready for easy use.
The situation we have described here is fairly common among our users. The lab director has been able to make a highly specialized Trio template, including all of the gene panels and phenotypic matches needed to get to their clinically relevant variants. After saving this official workflow, they may send it to a shared folder where the rest of the lab can retrieve the template. That way, the next time someone in the lab needs this Trio workflow, all they have to do is plug the VCF into the pre-designed template and get right to the clinical variants. Happy locking!
Why Use VarSeq for your Variant Analysis?
We’ve been trusted by doctors and scientists from around the world to deliver reliable, accurate, interpretations at scale. Our software is built from the ground up to be compatible with any existing lab and to deliver results with convenience, accuracy, and ease of use in mind. Whether you’re an existing VarSeq customer or you’ve found us on your search for a new variant interpretation service, take a look for yourself. Book a demo today!
Who knew variant interpretation could be so easy?