Creating Custom Scripts
The first part of the Getting Started Guide for Sentieon described the steps for downloading the Sentieon tools, acquiring a license file, and running the example script/pipeline to generate the VCF and BAM files.
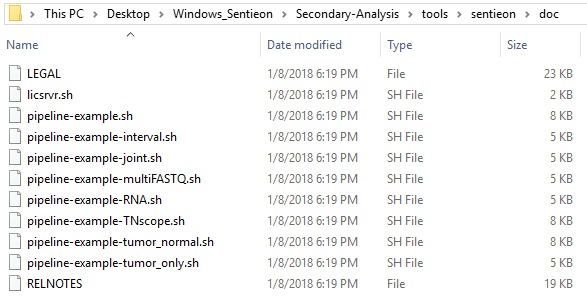
This blog will cover some custom script changes users can make to add more efficiency when running through multiple samples at once. We will explore some additional example scripts that come downloaded with Sentieon (Fig 1).
In a subdirectory within the Secondary Analysis directory, you’ll find the doc directory which contains a list of example scripts users can reference when building their own
One particularly helpful script is the pipeline-example-joint.sh. This is especially useful in the context of trio data, for example. A major consideration for the application of trio data is in the search for de novo variants; you want to jointly call the parents to determine if the de novo variant for the proband is truly called reference for the parents.
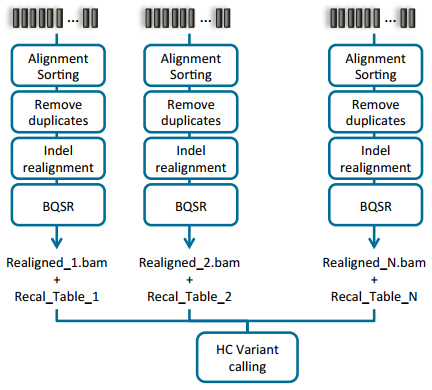
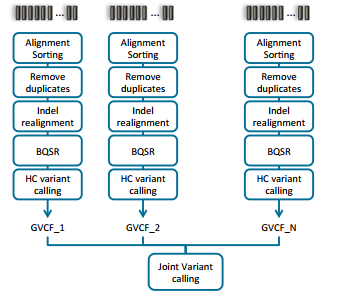
Doing joint calling on multiple samples at one time can be done in a couple of ways. The manual illustrates these options in section 9.3.2 (Fig 2 & 3). Option one is to process each sample individually to produce the BAM file for each, then process all samples collectively using the variant caller (Fig 2). The second approach is to process each sample individually through the variant calling step, then ultimately create a comprehensive GVCF file. The main difference between a VCF and GVCF is that the VCF is only a list of variants and genotypes for a sample, while the GVCF will have blocks summarizing the reference regions and their respective read depths. This is then used to “fill in” a reference genotype when merging multiple GVCF files into one joint called file. Note that VarSeq also supports importing GVCF files directly and similarly fills in using the data provided for ref-regions in each GVCF file.
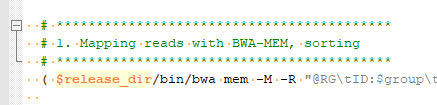
You can get a sense of how to designate your samples from the joint calling script (Fig 4). You are going to define the path to


Remember, this blog is a follow up to our first Sentieon startup blog. Part 1 will give you instruction on how to run the Sentieon scripts once you have designated your samples and customized your script. Also, please feel free to reach out to Golden Helix if you would like to start a trial of Sentieon or learn more about the improved performance and accuracy in variant calling.