Clinical testing labs produce reports as the end product of the NGS variant detection and interpretation workflow. Necessarily, the content, detail, and presentation of the report needs to be specialized to each clinical lab, and potentially each offered test. Our last blog post introduced the new Word-based report templates in VSClinical. In this blog post, we will introduce and explore the technologies that allow customizing the report templates to produce high-quality, test-specific, and largely automated clinical reports.
The Inputs: Variants, Sample and Results
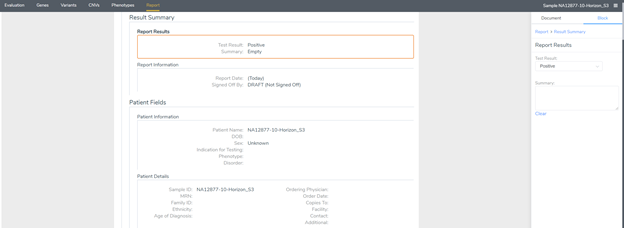
The report templates utilize data from throughout the VSClinical workflow. This data is assembled into a sample-specific JSON file that is then used to fill in the word template. This file contains information from each of the workflow tabs and consists of variants and CNVs that are selected for reporting with their selected report status, a phenotypes list, and a gene list. Also included are the sample data and the final result status as selected in the report tab. All this data can be reviewed, and much of it edited, from within the block editor of the report tab. Simply click on each section, and the right-hand bar block editor will switch to allow changes to the fields for that section.
VSClinical Word-Based Templating
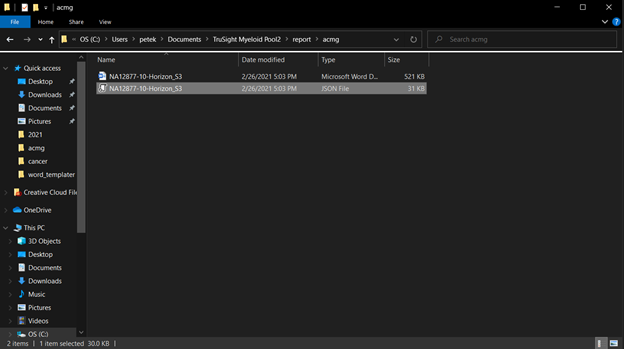
There are several files created inside the project folder for the current sample when rendering a report. You also create and select an input Word-based “Report Template” file. See the previous blog post for more details on this.
When you click “Render” on the report tab, the current sample evaluation state is saved to a per-sample JSON file. This file, along with the selected Word template file is used to create the report Word file using the sample as the file name. If changes to the evaluation are made, they will not appear in the report until it is rendered again.
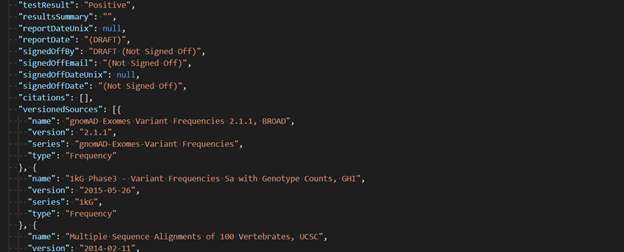
If you are trying to edit a report template, for example, to add a new field, it can be useful to look at the JSON file containing the evaluation data to find the field name of the data you would like to add to your report (see below). Once you know the name of the field you want, adding it to your report template is easy. If we wanted to add a top-level field like 'signedOffBy' to our report, we would simply insert it into our Word template file surrounded by brackets, {signedOffBy}.
Scopes and Conditions in Templates
What if you want to add a field that is embedded within some other object? For example, let’s say we wanted to add the ‘patientName’ field from the ‘sampleState’ object. Before we can include the patient’s name, we have to open the sample state scope. This is done by surround the scope name, preceded by a #, with brackets {#sampleState}. Once the sampleState scope is open, the patientName field can be referenced normally. The scope should be closed when no more fields are needed. This is done with a forward slash surrounded by brackets {/}.
Another useful tool available to you when customizing your templates is the ability to conditionally include content in your report. This is done the same way as opening a scope, using an expression or variable preceded by #. If the expression or variable evaluates as true the conditional scope will be included, and if it evaluates as false the scope will be omitted.
If you would like an alternate section to be displayed in the case of a false value, you can invert the expression or variable using ^ instead of #. Meaning if the conditional scope evaluates to false it will be included and vice versa. A great example of this can be seen in the results section of our Trio Report Template.

'testResults|isPositive'Loops and Variable Length Content
Another useful feature of our report templating system is the ability to display variable-length content. For example, you can have a section repeated for each reported variant or CNV. Or you can have a table be filled with a variable number of rows based on the contents of the report. Looping through a variable-length list is done in much the same way as opening a scope or including a conditional section. For example, if you would like to loop through the 'variants' list, use {#variants} to open the section and {/} to end the section. The section will be repeated in the rendered report for each item in the list. The scope is also opened for the contents of each of those items.

{#variants|relevantVariants} top perform the loop and open the scope. Variables like {name} will refer to the data for each variant in the list.Custom Logic with Inline Filters
There is one more great tool at your disposal when customizing report templates. That is the use of filters. They are so useful; we use them all the time in our shipped templates and show up in our screenshots in this post! Filters can be used to modify or manipulate data in a variety of ways and can also be used to include dynamic auto-filled text in your reports. There are a variety of system filters already included and used in our shipped templates, but you can also define your own custom filters to suit your needs. Filters are in fact just javascript functions that take data from the template and can be defined to return any transformation or expression based on that data. Filters are called using | after a value or object. For example, {#testResult|isPositive} takes the value testResult and passes it to the filter isPositive. The isPositive function then returns true if the input value is considered positive, and false otherwise.

"Positive"Another example is {#variants|relevantVariants} which takes the list variants and passes them to the filter relevantVariants. This function then returns a new list that does not include variants that have been set as 'Do Not Report'
To create your own filter functions, first, open the filters location. This can be found under the word template drop-down in the right-hand bar of the report tab. Then simply add your functions to either acmg.js or cancer.js depending on which VSClinical workflow you are using.
For inspiration on how to use filter functions, it may be useful to look at our existing system files. These can be found by going to Tools > Open Folder Folders > Program Folder in the VarSeq menu and then navigating to "Data\ReportTemplates\filters". Here there will be the files acmg.js, cancer.js, and utils.js which contains filter functions specific to the ACMG workflow, the Cancer workflow, and both workflows, respectively.
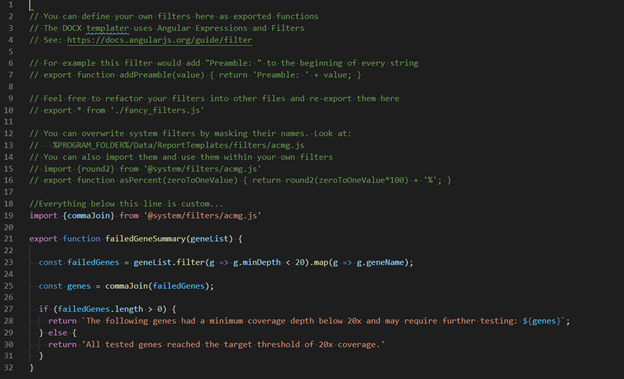
"acmg.js" custom filter file. This function imports and uses the commaJoin filter from the system acmg.js file and exemplifies the construction of custom report language based on the current evaluation.Once you have edited the filter files and added your own custom filters you’re ready to start using them inside of any of your personalized word templates!
The Word template system is based on a stand-alone version of the AngularJS template engine. The library that runs the Word template system is called Docxtemplater. Here are a number of useful guides and reference material for developing your own custom report filter functions:
Flexible and Easily Designed Reports
With the embedding of custom JavaScript functions, quite a lot of flexibility is enabled in our new Word-based report template system embedded in VSClinical. While some examples are provided in our existing templates, there are no limits to the ways in which you can modify, group, and transform the state of your evaluation into your specialized clinical report. We look forward to seeing how our users take this into new directions we cannot even anticipate! As always, we are happy to set up calls with our customers to do some more in-depth training on this powerful capability. Just drop us a line at support@goldenhelix.com and we will be happy to assist. Feel free to also check out some of our other blogs that contain important, useful news and updates for the next-gen sequencing community.