VSPipeline: Automating your Tertiary Workflows
The first part of this “Automating & Standardizing your NGS Workflow” blog series covered the secondary analysis steps of read alignment and variant calling with Sentieon. The next step is to transition into the tertiary analysis via utilization of our workflow automation tool, VSPipeline. VSPipeline operates as a command-line tool meant to simplify the deployment of running new sample variants through an automated process using a predesigned project template in VarSeq. Our utilization of VSPipeline begins with exploring a prebuilt project template in VarSeq.
When building a project template in VarSeq, you need to consider which criteria are necessary for filtering variants. VarSeq imports all quality data from the VCF file and has an extensive list of annotations and algorithms that help narrow the search to clinically relevant variants. Here is a quick summation of relevant content to integrate into your workflow.
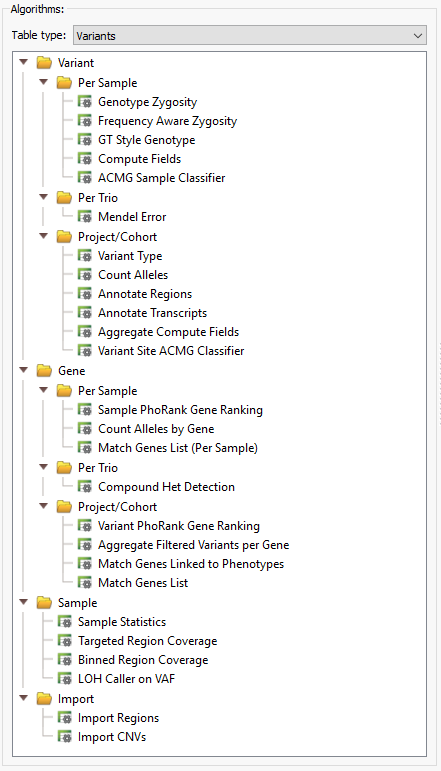
Algorithms
VarSeq provides a long list of helpful algorithms which can be incorporated into a filtering workflow, whether you are looking to:
- Compute coverage statistics for your panel
- Compute genotype zygosity
- Compute custom formulae
- Determine automated ACMG classification
- Perform trio or extended family analysis
- Prioritize patient phenotypes
- Detect copy number variation
- Simple sample statistics
Annotations
All expert-curated data sources are accessible through VarSeq and are directly annotated against the imported variants. These annotations serve as additional filtering criteria when searching for relevant variants. It is an extensive list, composed of numerous fields that can individually be incorporated into a standardized workflow.

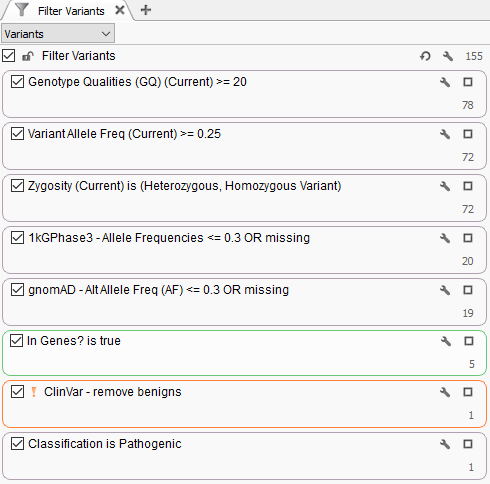
For this example template, variants are filtered for a few specified fields (Genotype Quality, Variant Allele Frequency, and Genotype Zygosity computed from the VCF GT field). Next, variants are then filtered for rarity using 1kGPhase3 and gnomAD to isolate variants seen at a frequency of 30% or less, or are completely novel. Then we added a sample-specific gene list defined in a manifest file. Lastly, known benign variants in ClinVar are excluded and the ACMG classifier algorithm is used to isolate a pathogenic variant in this given sample.
This workflow design is then saved as a project template and utilized in the VSPipeline batch script. Seen in Figure 4, the full content for this project resides in a Cancer_Gene_Panel directory which contains the sample VCF and BAMs, sample manifest file designating specific genes for each sample, the project template file, and the vs_script.vs-batch VSPipeline script.


The vs-batch script itself contains the paths for project creation, sample VCFs, and sample manifest file (Figure 5). This script will also control for automatically downloading any missing annotation sources the template requires. This script can handle many different commands which can include various export options or simply generating a final project which will be this example. Here is a link to the VSPipeline details for more information on this specifically.
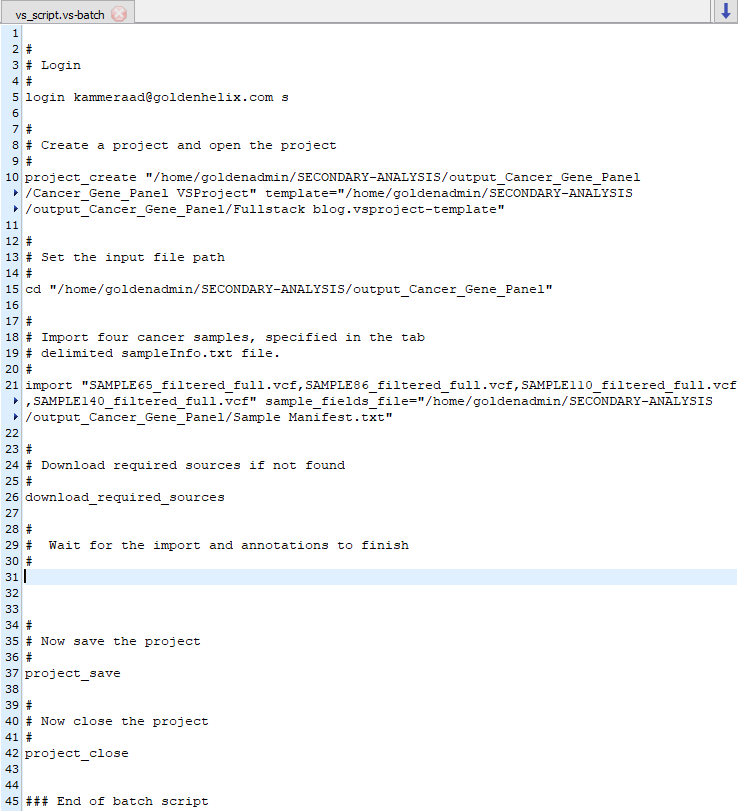
Figure 6 illustrates the execution of the project creation by running the script, and the end result is the final project auto-generated as output defined by the script (Figure 7).
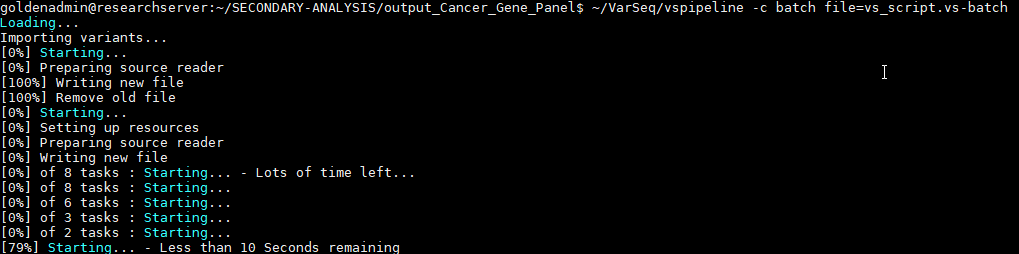
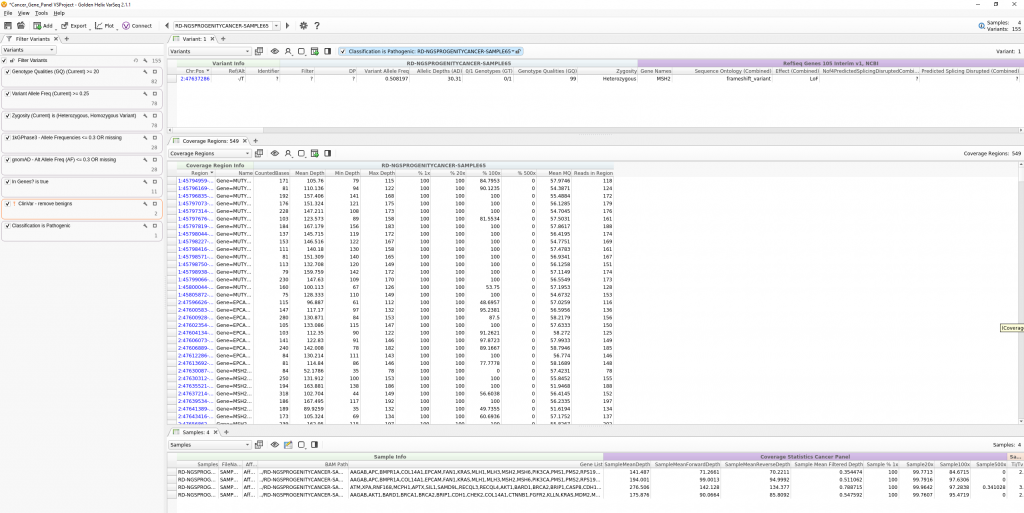
As you can see in the final project, the preconstructed workflow was successful in isolating pathogenic variants in each sample in the project. In the next part of this blog series, we move on to the final steps of interpretation and classification of these variants through the ACMG Guideline process via VSClinical. This includes the rendering of a final clinical report for each sample. As always, do not hesitate to reach out to support@goldenhelix.com with any questions regarding workflow automation via VSPipeline.